Woooo! It’s fourth of July, FREEDOM! I’ve been having the weirdest bougie cravings, like lobster… And being the poor college student I am, I didn’t want to go out and buy it…so I decided to make myself some! And that way, I can make it for my family back home. :]
Lobster Fiesta!
This recipes is actually ridiculous simple, so to make up for the really short post, I will put a lot of pictures! Wooooo!
Ingredients:
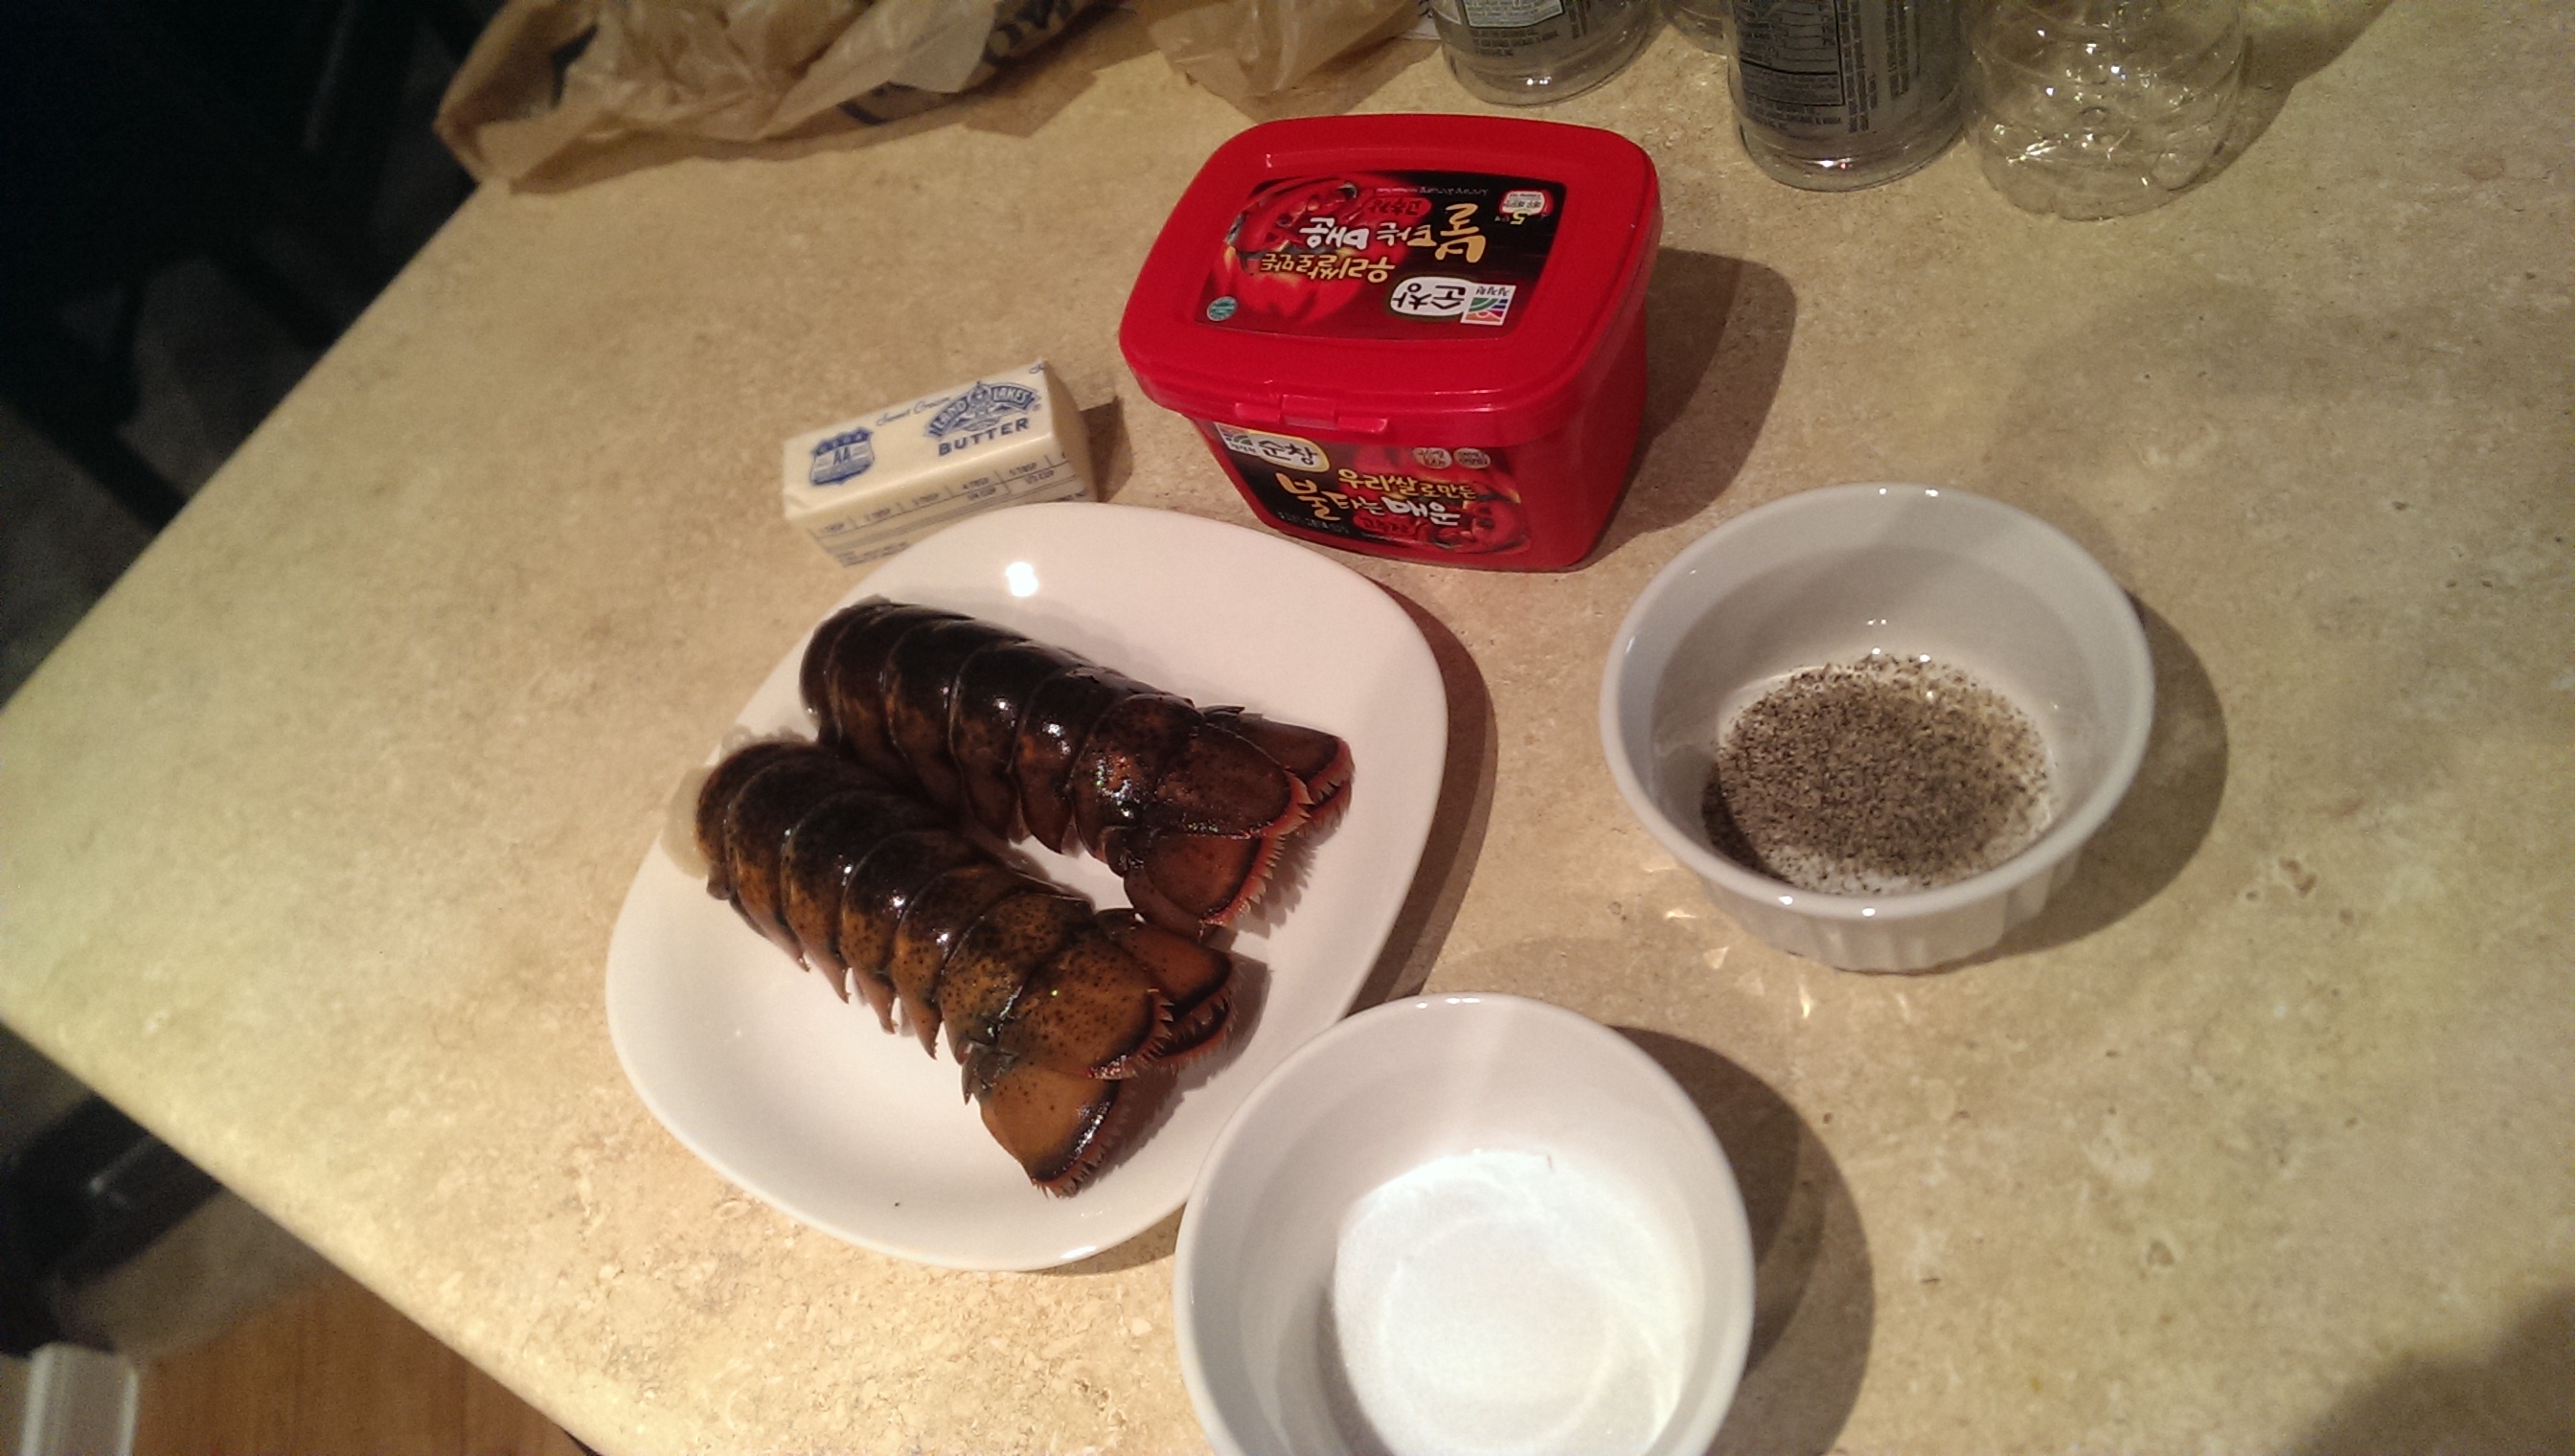
- Lobster tail (x2)
- 1/3 cup of butter
- 1/2 tsp paprika
- salt & (white) pepper to taste (aka I put a lot…)
- lemon for garnishing

Ingredients!
The lobster tails I got from a grocery store in town, you can either go to H-E-B or Krogers. I’m not sure if Publix has frozen lobster tails for sale but it was only $5.99 per tail so I figured it was a good deal. By the time I got home, I realized I didn’t have paprika, and I used black pepper because I couldn’t find my white pepper, but it still came out delicious. I tried to replace paprika with Korean pepper paste, and although it added a pinch of spice and a unique flavor, I don’t recommend it because it’s a little strong and takes away from the lobster’s flavor. And I think white pepper would have brought out the lobster flavor better than the black as well. Oh well, lessons for my next attempt! 😛
You want to preheat your oven to broil at this point because it does take a little while. And be warned, the butter will cause your oven to smoke up, so you might want to crack some windows open.
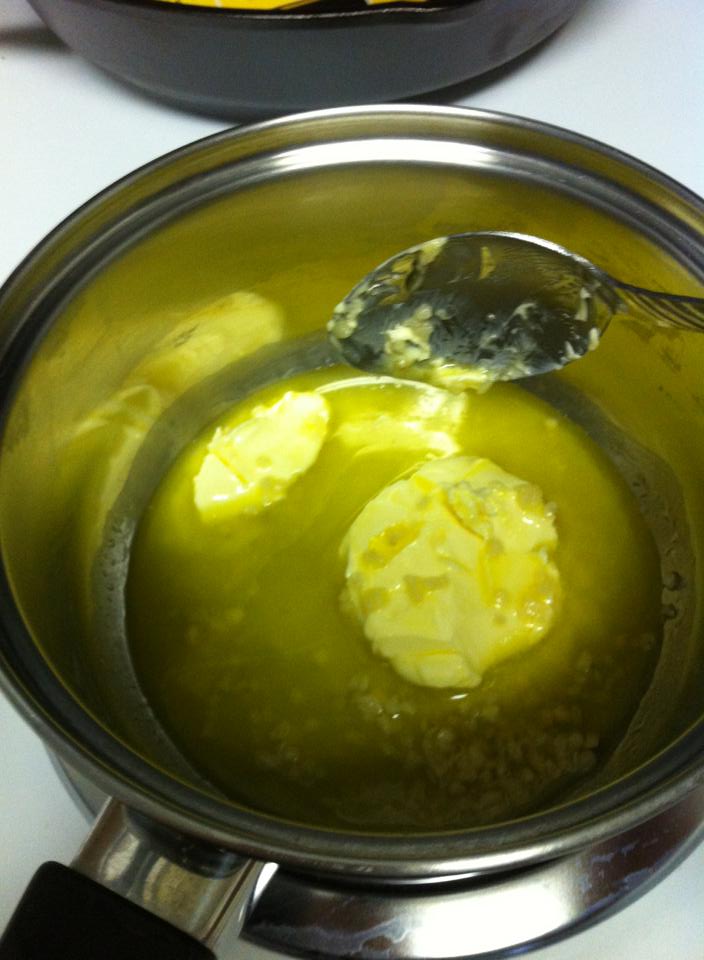
You start with using a sharp knife or a pair of kitchen scissors to cut the shell down the middle. You want to be able to open it up. Then use a spoon to separate the lobster from the shell and have it loosened up. I melted the butter in the microwave and added the pepper and salt and mixed it all together. I used the same spoon to spoon in the butter into the lobster. You want to keep the lobster inside the shell so it doesn’t overcook and dry out and it gets to drown in the butter!
Before the over…
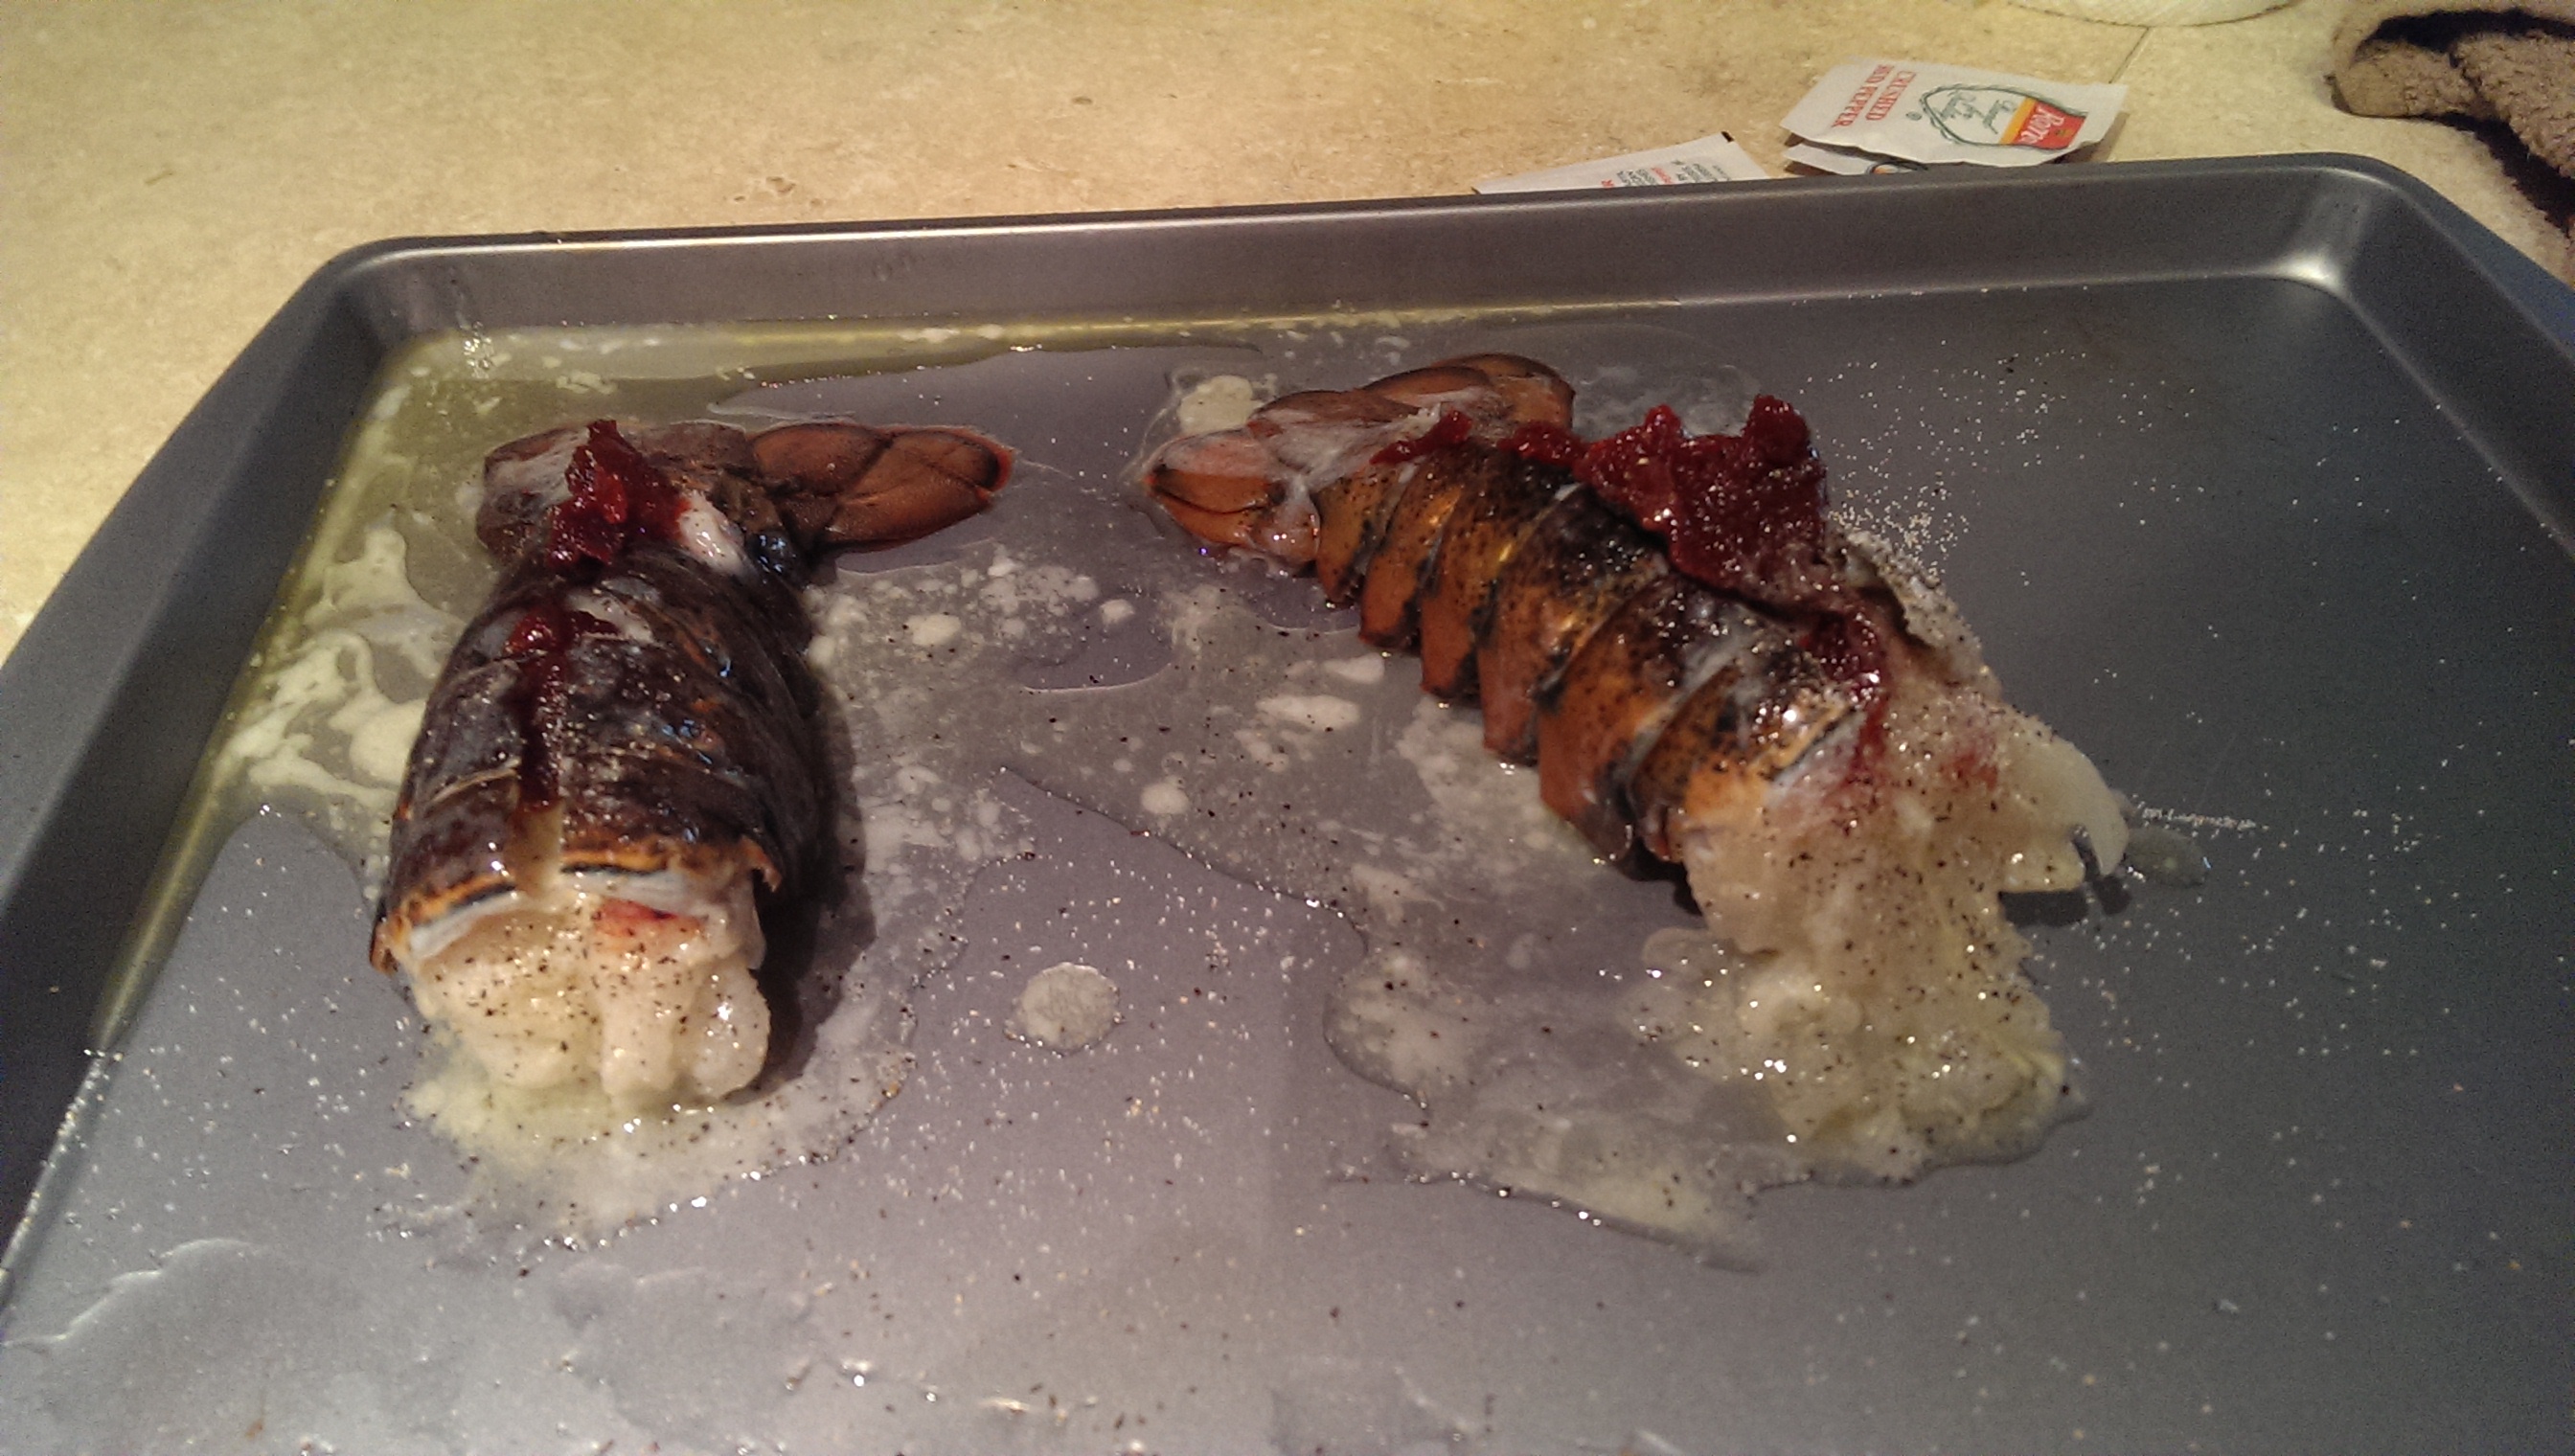
Buttery goodness
And then this is me waiting impatiently outside the oven….
Broil, broil, broil…
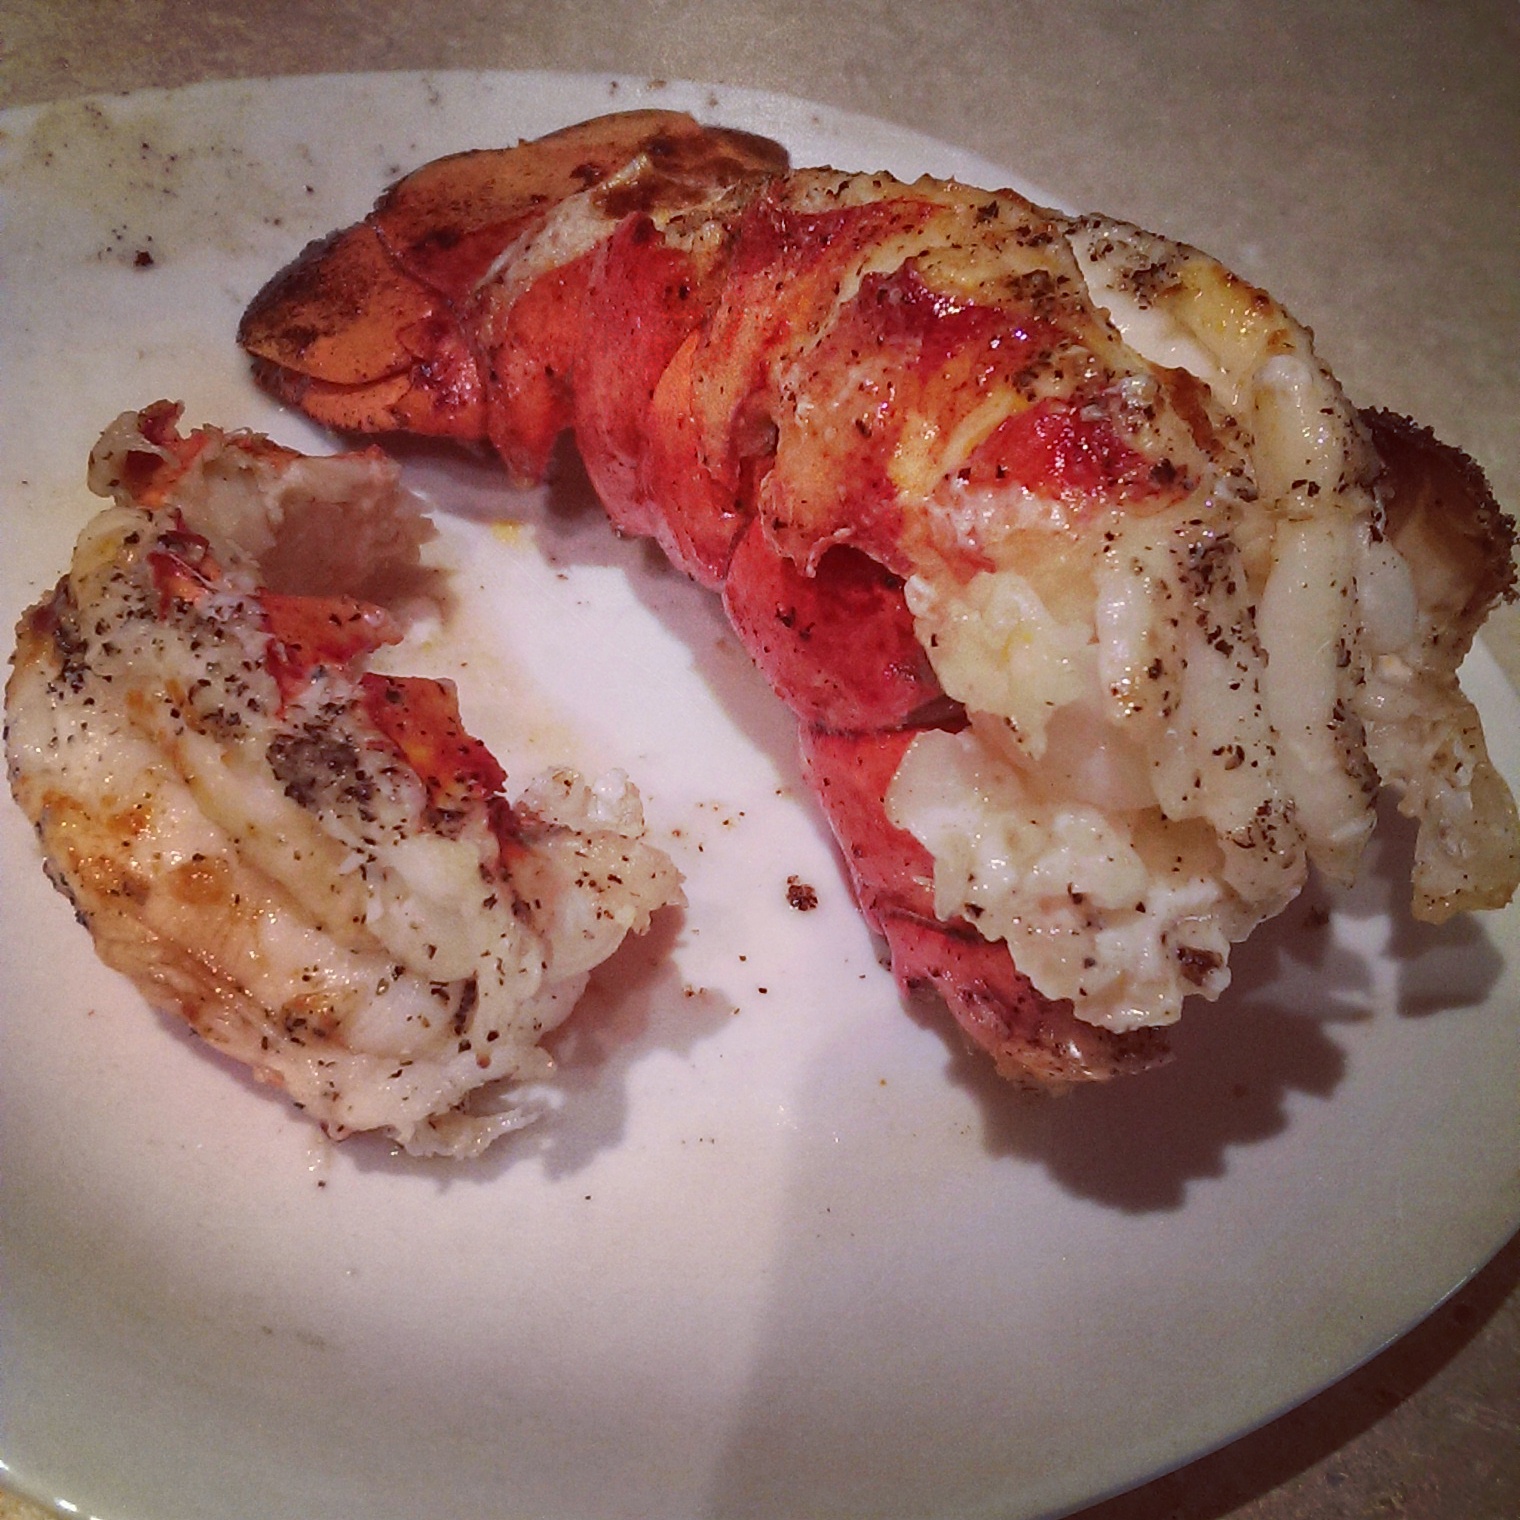
The cook time varies by weight. Half pound tail should take around 5-10 mins, while a pounder should be closer to ~20 mins. It will also vary depending on level of defrost, but the meat should look opaque and the shell would likely be browned at this point. And you just take it out and bam!
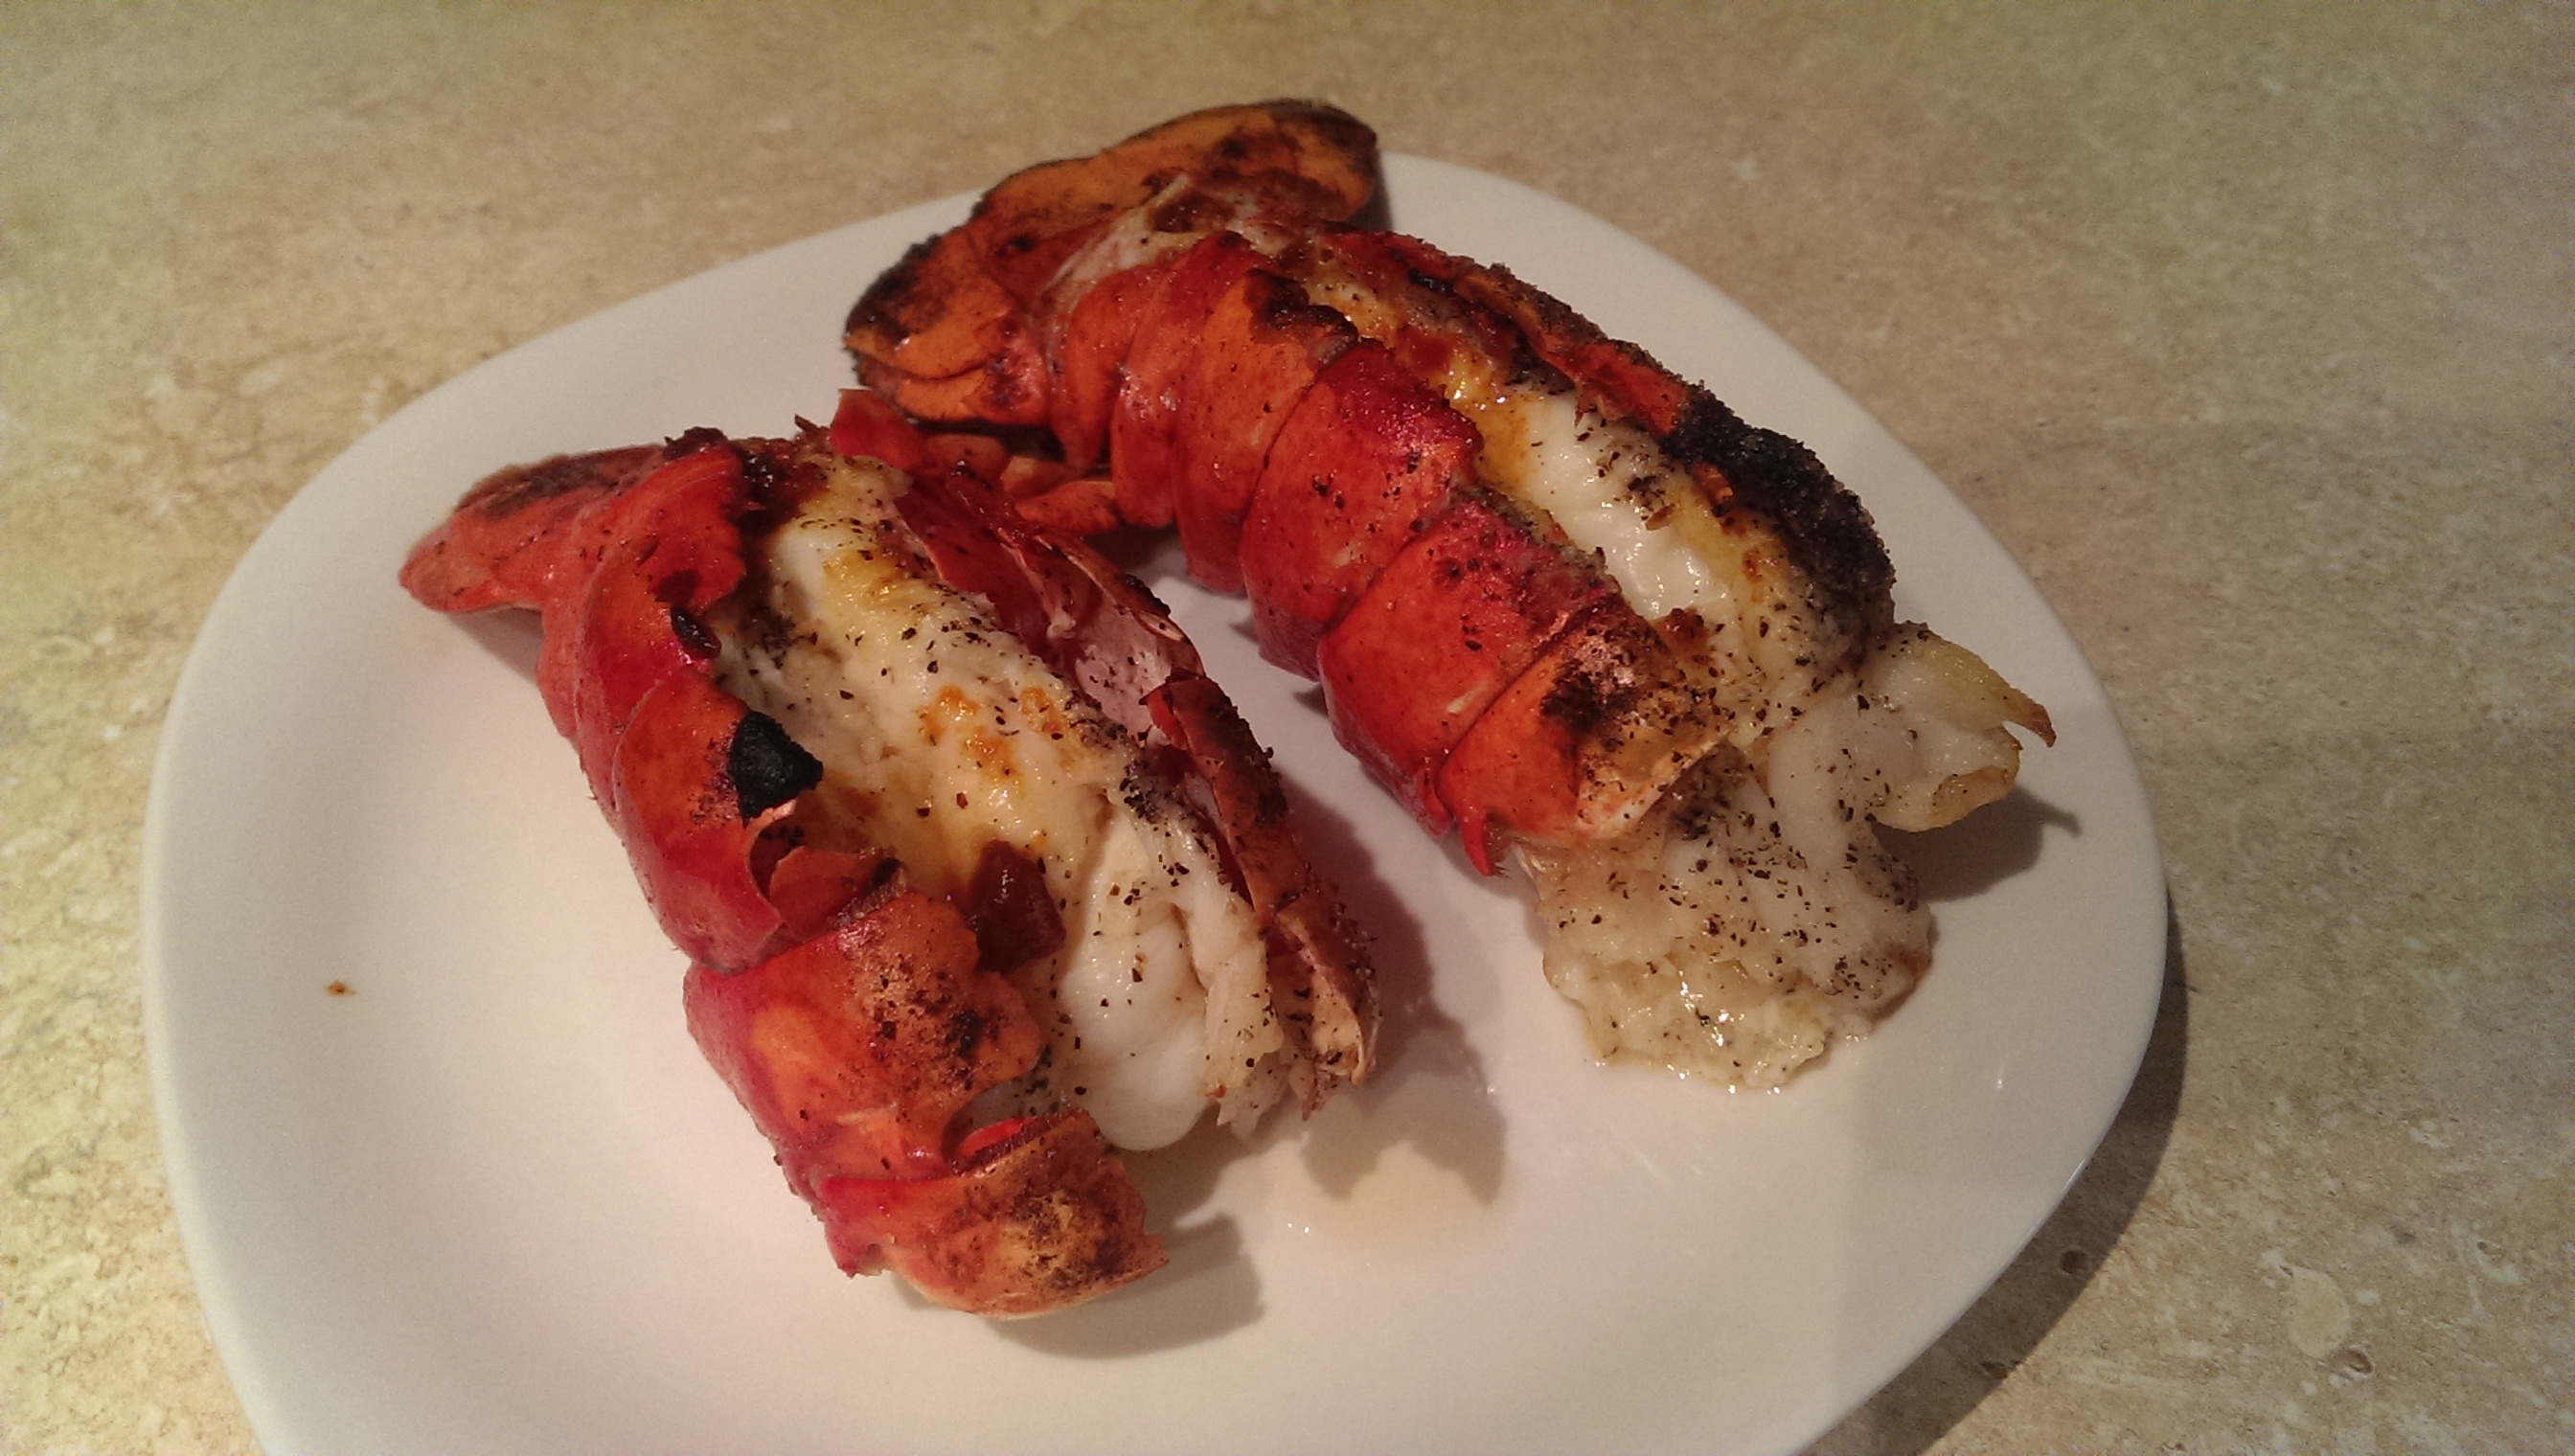
Two lip smackin’ tails!
For presentation, you can take the meat out of the shell and leave it attached only on the tail for a classier look. This is also where you add the lemon for garnishing and if you didn’t use all the butter, you can use it for dip here as well. I highly recommend enjoying this delicious meal with some veggies and a nice cup of wine!
❤ Chef jKwong